Paracord, or parachute cord, was used by the military in World War II in parachutes as suspension lines. After the soldiers parachuted down, they found many uses for the paracord. This versatility has made paracord surge in popularity in recent years. Time to jump on the crazy train!
Let's get started with the bracelet!
Supplies:
1. Paracord (blue - Michael's, black - Home Depot)
2. Scissors
3. Lighter
4. Measuring Tape/Ruler
*NOTE: Paracord at Michael's is about $2.50 for 16 feet, in bright colors. Paracord at Home Depot is about $2.50 for 50 feet, in not so vibrant colors*
Step 1: Measure your wrist, add about an inch to make the bracelet more comfortable. You can add more than an inch if necessary
Step 2: Take the wrist measurement, with the added inch(es), and add about another 5 inches or so to account for the knot, this will be the core of the bracelet
Step 3: Fold the piece of paracord in half and use the lighter to burn the ends of the paracord to prevent the cord from fraying
Step 4: Tie a knot at the end of the paracord, try to get the knot close to the end
Step 5: Take the initial measurement; cut that many feet of your paracord. Fold the cord in half to find the middle, and place that behind the core
Step 6: Tie a square knot as shown
Step 7: Tie the same knot, but from the opposite side
Step 8: Repeat the knot tying, alternating sides until just before you get to the knot at the end of the core, it's okay if the bracelet starts to curl while you're tying the knots
*TIP: If you forget which side you left off on, look for the knot that is furthest down. Which ever side the knot is on, you start from that side*
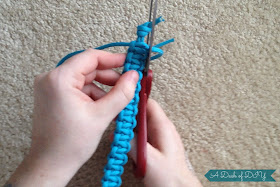
Step 9: Once you get close to the end of the core, tighten the last knot and cut the remaining strings close to their base
Step 10: Use the lighter to burn the cut paracord, so that it won't fray, aaaaaaaaand.......
Step 3: Fold the piece of paracord in half and use the lighter to burn the ends of the paracord to prevent the cord from fraying
Step 4: Tie a knot at the end of the paracord, try to get the knot close to the end
Step 6: Tie a square knot as shown
Step 7: Tie the same knot, but from the opposite side
Step 8: Repeat the knot tying, alternating sides until just before you get to the knot at the end of the core, it's okay if the bracelet starts to curl while you're tying the knots
Step 9: Once you get close to the end of the core, tighten the last knot and cut the remaining strings close to their base
Step 10: Use the lighter to burn the cut paracord, so that it won't fray, aaaaaaaaand.......
You're finished!
Enjoy your new paracord bracelet!


No comments :
Post a Comment